If you find yourself applying the same Item filters and View settings every time you go to the Items section in KaiNexus, you should consider creating a custom List that will remember that configuration every time you open it. You can even create multiple custom Lists so that you can quickly and easily switch between certain filters and layouts.
To access your custom Lists, click the Items drop-down in the navigation bar.

Select the name of the List you want to open in the resulting drop-down menu. To find your List:
- Hover over My Lists, and the drop-down will expand to include all Lists you've created or for which you've been made an Owner. If this option is not available, you have no such Lists.
- Any Lists that you've pinned will appear beneath "My Lists."
- Hover over Shared Lists, and the drop-down will expand to include Lists for which you've been made a Viewer or Editor. If this option is not available, you have no such Lists.
/Ofie/Ofie%20Profile%20Pic.png?width=50&height=50&name=Ofie%20Profile%20Pic.png) Pro Tip: Lists under My Lists have an icon indicating their Share setting. Lists under Shared Lists have an icon indicating whether you are a viewer or editor of that List. Check out our support page on sharing Item Lists to learn more.
Pro Tip: Lists under My Lists have an icon indicating their Share setting. Lists under Shared Lists have an icon indicating whether you are a viewer or editor of that List. Check out our support page on sharing Item Lists to learn more.
Pro Tip: Right-click on a List or hover over a List and select the ellipsis icon to reveal quick actions. Depending on your permission level, you can quickly edit, pin, or delete the List.

Keep reading to learn about:
Create a custom List
Who can create a custom List?
Anyone with the "Create Item Lists" permission can create Item Lists in the Items section.
Create a custom List from the navigation bar
To create a custom List from the navigation bar at the top of KaiNexus:
- Click Items in the navigation bar.
- Click Create List in the resulting drop-down and the Item Filter window will open.
- Name: The name will be used to identify this List.
- Add any necessary filters.
- Click Save. You will automatically be taken to the new List.
Pro Tip: When you create a new List, it will default to List View and include a set of default columns. System Administrators can change which columns automatically appear on new Item Lists. Learn more by visiting this support page.
Create a custom List from an existing List
If you've already filtered a List of Items and applied your preferred View settings, you can save that List as a custom List. To do so,
- Click either Edited or Actions.
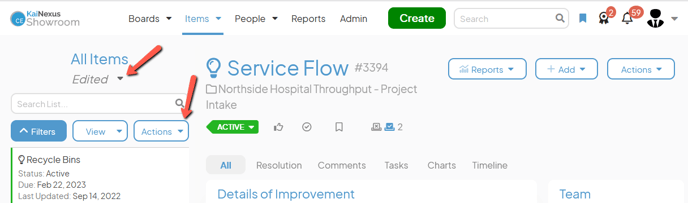
- Click Save List As in the resulting drop-down menu, and the New List window will open.
- Name: The name will be used to identify this List.
- Click Save. The new List will be created, using the filters and View configuration already in place.
Manage a custom List
Who can manage a custom List?
Anyone with the "Create Item Lists" permission can manage Item Lists in the Items section.
![]() Caution: You can only edit Lists for which you're the Owner or an Editor. If you are a Viewer, then you won't be able to edit it.
Caution: You can only edit Lists for which you're the Owner or an Editor. If you are a Viewer, then you won't be able to edit it.
Edit a custom List from the navigation bar
To edit a custom List from the navigation bar at the top of KaiNexus:
- Click Items in the navigation bar.
![]()
- Right-click the name of the List you want to edit.
- Click Edit in the resulting drop-down menu. You'll be redirected to that List and the Edit List window will open.
-
- Make any necessary updates to the List's name, filters, or other options.
- Click Save. These updated settings will become the List's default.
Edit a custom List from the List itself
If autosave is enabled on the List with which you're working, any changes you make to its filters or View settings will automatically be saved as soon as they're made.
If autosave is not enabled, however, those changes will be temporary unless they are manually saved. You'll know a list has unsaved changes if "Edited" appears near its name.
To manually save an Item List from the List itself:
- Click either Edited or Actions.
- In the resulting drop-down menu:
- To update the existing custom List with the new settings, click Save List.
- To save the current configuration as a new List while leaving the original List unchanged, click Save List As and the New List window will open.
- Name: The name will be used to identify this List.
- Click Save. The new List will be created, using the filters and View configuration already in place.
- To discard your changes and return the List to its default state, click Discard Changes
Enable (or disable) autosave
Each custom List has autosave disabled by default. If you want your list to automatically save each change you make to its configuration, you should enable autosave. If you want to be able to make temporary changes that aren't automatically saved, you should leave autosave disabled.
You'll know a List has autosave enabled if "AutoSave On" appears near its name.
To enable or disable autosave, open the List with which you want to work, then:
- Click Actions at the top of the List.

- To enable autosave, click Enable Autosave; to disable it, click Disable Autosave.
Copy a custom List to a Board
You can copy any List you have permission to manage to any Board you have permission to edit. The List will be added as an Item List Card with the same name and configuration.
![]() Boards can have up to 16 Cards. Once a Board has 16 Cards, you won't be able to copy a List to it.
Boards can have up to 16 Cards. Once a Board has 16 Cards, you won't be able to copy a List to it.
To copy a List to a Board, open the List with which you want to work, then:
- Click Actions at the top of the List.
- Click Copy to Board in the resulting drop-down menu and the Copy to Board window will open.
- Use the Choose Existing field to search for and select the Board to which the List should be copied. Only Boards you have permission to edit will be listed.
- Click Copy.
Pin (or unpin) a custom List
If you frequently access a particular List, you can pin that List to the top level of the Items drop-down in the navigation bar for easy access. If you no longer need such easy access to a List but want it to remain accessible under "My Lists" or "Shared Lists," you can unpin it.
To pin or unpin a custom List:
- Click Items in the navigation bar.
![]()
- Right-click the name of the List with which you want to work.
- Click Pin in the resulting drop-down menu to pin the List to the top level of the drop-down menu.
If the List is already pinned, click Unpin to return the List to its original position in the drop-down menu.
Subscribe to (or unsubscribe from) a custom List
Your weekly Subscription email will include a link to any Lists you're subscribed to and the number of Items that are included in each one. This can remind you to check in on certain Lists regularly and act as a notification that your attention is needed.
Pro Tip: You can customize which days of the week you receive the subscription email in your notification preferences.
You can subscribe to any List grouped under "My Lists" in the navigation bar's Items drop-down. Lists to which you're subscribed will be indicated on that drop-down by a colored subscription icon to their right.
To subscribe to or unsubscribe from a custom List:
- Click Items in the navigation bar.

- Hover over My Lists in the resulting drop-down menu, and the drop-down will expand to include all Lists you've created or for which you've been made an Editor.
- To subscribe to a List:
- Hover over its name and click the gray subscription icon that appears to its right.

- Hover over its name and click the gray subscription icon that appears to its right.
- To unsubscribe from a List:
- Click the colored subscription icon that appears to its right.

- Click the colored subscription icon that appears to its right.
Delete a custom List
Who can delete a custom List?
Owners and Editors of a custom List can delete it.
![]() CAUTION: When you delete a List, the List is permanently removed from KaiNexus and cannot be recovered. Deleting a shared List will result in the List being deleted for everyone.
CAUTION: When you delete a List, the List is permanently removed from KaiNexus and cannot be recovered. Deleting a shared List will result in the List being deleted for everyone.
Delete a custom List from the navigation bar
To delete a custom List from the navigation bar at the top of KaiNexus:
- Click Items in the navigation bar.
![]()
- Right-click the name of the List you want to delete.
- Click Delete in the resulting drop-down menu, and the confirmation window will open.
- Click Delete. The List will be deleted and will disappear from the Items navigation bar drop-down.
Delete a custom List from the List itself
If you have already opened the custom List you want to delete, you can delete it directly. To do so:
- Click Actions at the top of the List.
- Click Delete in the resulting drop-down menu and the confirmation window will open.
- Click Delete. The List will be deleted and will disappear from the Items navigation bar drop-down.