Private Items have restricted visibility. Users without the necessary permissions cannot access the Item and its information. This prevents any privileged information from becoming general knowledge while still allowing it to be entered into KaiNexus.

Private Items will have a lock icon beside their title.
Who can view a Private Item?
Only the following people can view a private Item:
- People on the private Item's Team
- Anyone with the "View Private" permission for Items in its Location(s).
- Note: The "Toggle Private" and "Edit" permissions do not give the ability to view private Items.
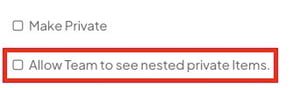
- If your private Item is nested under another Item and the "Allow Team to see nested private Items" checkbox is selected on the parent Item, then all parent Team members except for Followers can view the private nested Item.
- Note: Depending on your Template's configuration, the "Allow Team to see nested private Items" checkbox may not be available. Contact your Customer Success Manager if you'd like to add this option to a Template.
![]() CAUTION: Because private Items are, well, private, neither your organization’s administrators nor KaiNexus Support will be able to help you with them unless they are added to the Item’s Team or have the "View Private" permission.
CAUTION: Because private Items are, well, private, neither your organization’s administrators nor KaiNexus Support will be able to help you with them unless they are added to the Item’s Team or have the "View Private" permission.
Do private Items affect Reports?
A private Item’s data and metrics are included in your organization’s metrics and Reports, but people without permission to view the Item will not be able to see the Item's name or open the Item from any Reports.
The Item will also be counted towards the total number of Items in the organization (or in its parent if it has one), but again, it cannot be seen or accessed through any Lists by users without the right permissions.
Are a private Item's children also private?
Nesting an Item under a Private parent does not guarantee the child will be Private. Whether a nested Item is private depends on the configuration of the child's Template.
/Ofie/Ofie%20Profile%20Pic.png?width=50&height=50&name=Ofie%20Profile%20Pic.png) Pro Tip: Contact your Customer Success Manager to configure your Templates so that child Items follow your preferred experience. If you have a question on why an Item is or isn't private, submit a support ticket.
Pro Tip: Contact your Customer Success Manager to configure your Templates so that child Items follow your preferred experience. If you have a question on why an Item is or isn't private, submit a support ticket.
How do I filter for private Items?
You can make an Item List or Report containing only private Items by using the Item Filter.
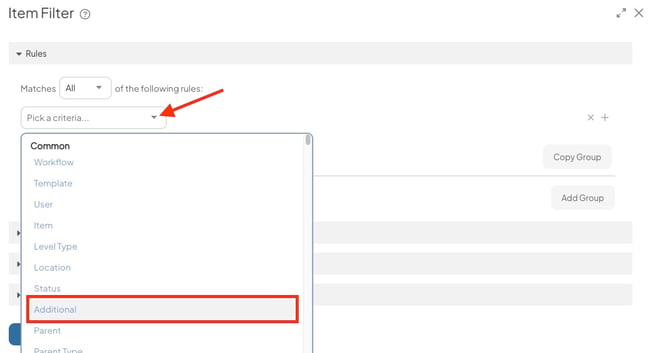
- Open the Item Filter. It may be in a different location depending on whether you are working with a Custom List, Item List Card, Widget, or Report.

- Select Additional in the rules drop-down.
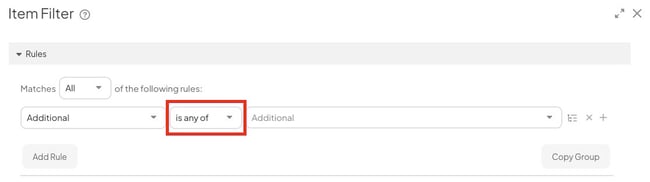
- Keep "is any of" as the selection in the logic drop-down to include private Items in your results. Switch the logic to "is not any of" to exclude private Items from your results.
- Select Private as the criteria.
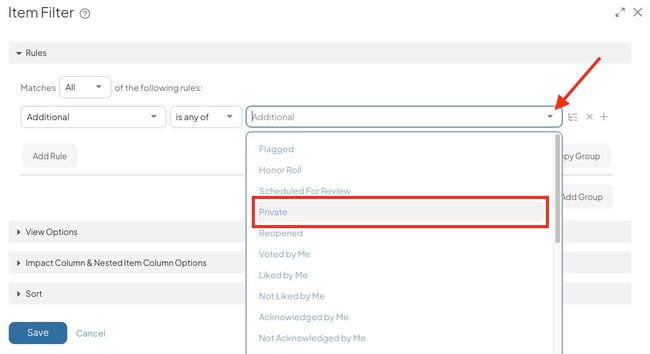
- Select Save.
Make an Item private
Who can make an Item private?
To make an existing Item private, you must have both of the following permissions:
- Permission to view and edit the Item
- The "Toggle Private" permission in the Item's Location(s)
Pro Tip: The "Toggle Private" permission only gives the ability to private a public Item and make a private Item public. It does not give the ability to view private Items.
Pro Tip: To make an Item private, your Item's Template must be configured such that the privacy setting is available. If you need to change your Template's configuration to enable the privacy options, contact your Customer Success Manager.
Make an Item private
You can make an Item private while you are creating or editing it.
To make an Item private while you are creating it:
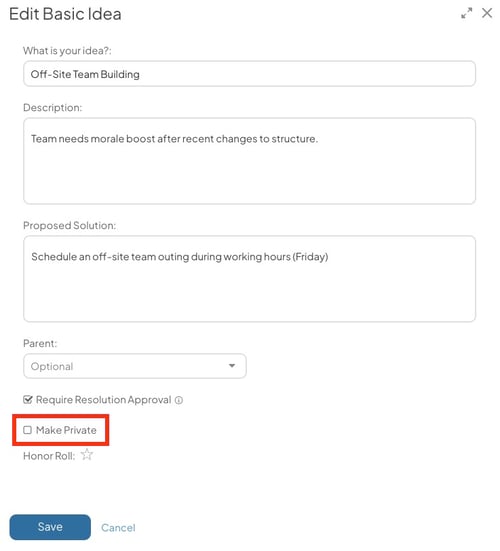
- Locate the Make Private checkbox. It will be listed below all Fields and Attributes on your Template's Create Screen.
- Select the Make Private checkbox.
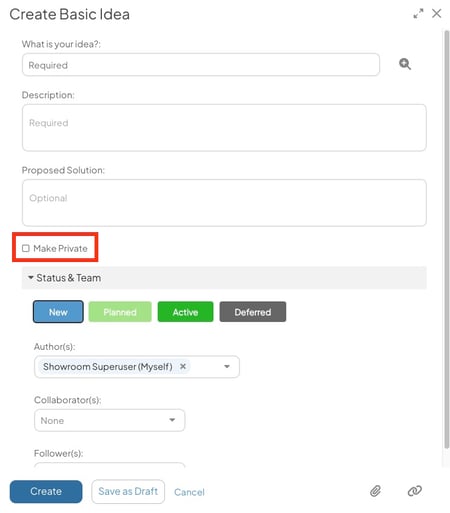
- If you don't see this option, you either don't have permission to make that Item private, or that Item's Template has been configured by your organization so that that checkbox is hidden.
- Depending on the Template's configuration, you may also see the Allow Team to see nested private Items checkbox. Select it to allow all Team members (except for Followers) to see private Items that are nested beneath the current Item.
- Select Create.
To make an existing Item private:
- Select the Actions button at the top right of the Item Work Panel.
- In the resulting drop-down, select Edit Details.

- Scroll to the bottom of the Edit window. The Make Private checkbox will be below all other Fields and Attributes for your Item.
- Select the Make Private checkbox.
- If you don't see this option, you either don't have permission to make that Item private, or that Item's Template has been configured by your organization so that that checkbox is hidden.
- Depending on the Template's configuration, you may also see the Allow Team to see nested private Items checkbox. Select it to allow all Team members (except for Followers) to see private Items that are nested beneath the current Item.
- Select Save.
After an Item is made Private, it will have a lock icon beside its title. You'll see the lock icon on the Item itself and in Item Lists.

Example of an Item List Card with two Private Items.
Recommended Reading
We recommend checking out these support pages next: