Edit your Items to add new information and details as needed.
Who can edit an Item?
To edit an Item, you must have permission to view and edit it.
Only the following people can view an Item:
- Anyone on the Item's Team.
- Potentially anyone on the parent's Team.
- If the Item is not private and not in the New status, anyone with the "View" permission for Items in its Location(s).
- If the Item is private, anyone with the "View Private" permission for Items in its Location(s).
- If the Item is in the New status and is not private, anyone with the "View New" permission for Items in its Location(s).
Only the following people can edit an Item:
- Anyone on the Item's Team except for Followers or Participants.
- Anyone with the "Edit" permission for Items in this Location(s).
- For Items using the Standard Team Type, anyone with the "Assign" permission for Items in this Location(s).
![]() For more information on Team Roles (like Authors, Facilitators, Participants, and more!) check out this article.
For more information on Team Roles (like Authors, Facilitators, Participants, and more!) check out this article.
Edit an Item
To edit an Item, open the Item with which you want to work, then:
- Click Actions in the top right corner of the page.
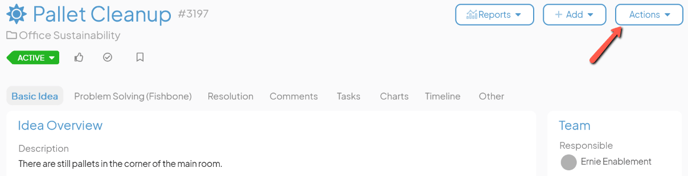
- Click Edit Details in the resulting drop-down menu and the Item's Edit Details window will open.
- Edit the Item's title and any of its fields or Attributes.
- Parent: Use this field to search for the Item (if any) under which this Item should be nested.
To search for and select a particular Item as a parent, you must have permission to view and edit that Item. - The Allow Responsible to edit Due Date checkbox: When this box is checked, the Item's Responsible Person will be able to edit its Due Date.
Both the presence and default state of this checkbox are determined by the Item's template's configuration. Additionally, only someone with permission to assign the Items will be able to see this checkbox. - The Require Resolution Approval checkbox: When this box is checked, the Item's Assigner or Facilitator will need to review a submitted Resolution and approve it before the Item will transition into the Complete status.
Both the presence and default state of this checkbox are determined by the Item's template's configuration. Additionally, only someone with permission to assign the Item will be able to see this checkbox. - The Make Private checkbox: When this box is checked, the Item will become private and only its Team members and people with the "View Private" permission for Items in its Location will be able to see it.
Both the presence and default state of this checkbox are determined by the Item's template's configuration. Additionally, only someone with the "Toggle Private" permission will be able to see this checkbox.
For a full guide to private Items, check out this support article. - The Honor Roll star: When the star is filled in, the Item is granted Honor Roll status. Typically, this is done to identify outstanding Items, flag them for future reference, and to recognize staff for their exemplary contribution.
The presence of this option is determined by the Item's template's configuration. Additionally, only someone with the "Honor Roll" permission will be able to see this checkbox. - Click Save to update the Item.
Edit particular details
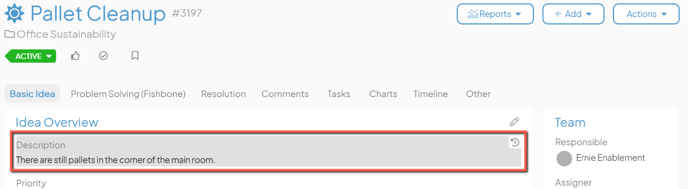
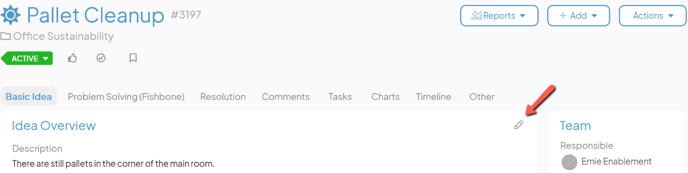
When you're looking at an Item, you may notice that only a particular set of information needs to be updated. In that situation, you can save time by either:
- Hover over the panel containing that information and click the pencil icon that appears in the top right corner. This will open a window in which only the fields and Attributes included in that panel can be edited.
- Hover over the field or Attribute you want to edit and, when it turns gray, click it. This will open a pop-up in which that element can be edited. For more information about editing a single field or Attribute, check out this article.