When creating or editing an Attribute Value, Level Type, Title, Position, Employee Type, or Certification, you have the option to include an icon to appear in the system alongside it.
What icons can I customize?
Select one of the default icons available or copy and paste the code of a specific icon from the Font Awesome library. KaiNexus offers Font Awesome 5 which will support all icons on the site including those marked with PRO.
Add an icon code from Font Awesome
When creating or editing an Attribute Value, Level Type, Title, Position, Employee Type, or Certification:- Click the link to the Font Awesome site: https://fontawesome.com/icons .
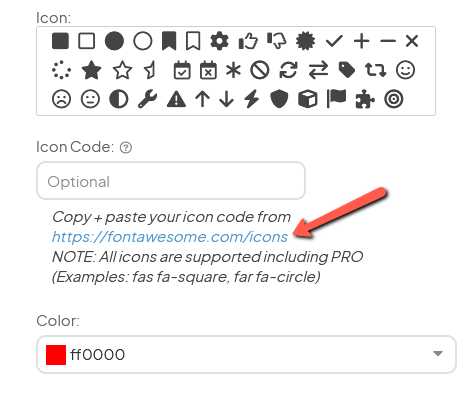
- Search the site for an icon and click the one you would like to use to open its page.
- Locate the icon code and copy the part that is within the quotation marks.

- Paste the icon code into the Icon Code field in KaiNexus.
- Replace the first half of the icon code — typically "fa-solid" — with one of the following style codes:
- fas: The icon will be filled in.
- far: The icon will have a bold outline and will not be filled in.
- fal: The icon will have a thin outline and will not be filled in.
- Finish configuring the Attribute Value, Level Type, Title, Position, Employee Type, or Certification as usual.
- Click Save.