
- Help Center
- Item Workflow
- Actions
-
Getting Started
-
Boards & Cards
-
Item Workflow
-
Charts
-
Item Lists
-
People
-
Reports
-
Admin
- Users > User Management
- Users > Titles
- Users > Positions
- Users > Employment Statuses
- Users > Certifications
- System > General
- System > Timeline
- System > Login Notices
- System > Tooltip Customization
- System > API Keys
- Organization > Network
- Organization > Level Types
- Organization > Roles
- Organization > Goals
- Organization > Impact Types
- Organization > Standard Work
- Organization > Weighted Scores
- Organization > Workflows
- Organization > Templates
- Organization > Fields
- Organization > Attributes
- Organization > Multi Chart Importer
- Other
-
KaiNexus Updates
-
Additional Modules
-
The KaiNexus Mobile App
-
Developer Documentation
-
Lean Strategy
-
Customization
-
Solve Problems
Transfer an Item
Move an Item from one Location to another.
KaiNexus identifies the Location in which the work on an Item was done — the Responsible Location. If you want to change the item’s Responsible Location(s), you can transfer it.
![]() Only Items using the "Standard" Team Type can be transferred. To see what Team Type your Item uses, open the Item and hover the template icon next to its title.
Only Items using the "Standard" Team Type can be transferred. To see what Team Type your Item uses, open the Item and hover the template icon next to its title.
When an Item is transferred:
- People who are normally notified of new Items in the new Location will receive a notification.
- People who have asked to be notified about Items that are transferred into the new Location will be notified.
Who can transfer an Item?
- The Assigner.
- Anyone with the "Assign" permission for Items in this Item's Location(s).
![]() If you have the right permissions but can't transfer an Item, the transfer capability may have been disabled for this Item's Template. Reach out to your Customer Success Manager to confirm.
If you have the right permissions but can't transfer an Item, the transfer capability may have been disabled for this Item's Template. Reach out to your Customer Success Manager to confirm.
![]() For more information on Team Roles (like Authors, Facilitators, Participants, and more!) check out this article.
For more information on Team Roles (like Authors, Facilitators, Participants, and more!) check out this article.
Transfer an Item
To transfer an Item, open the Item with which you want to work, then:
- Click Actions in the top right corner of the page.
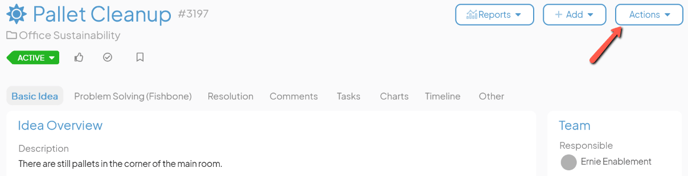
- Click Transfer in the resulting drop-down menu and the Item's Transfer window will open.
-
- Reason for Transfer: Enter an explanation as to why the Item is being transferred. This text will be added to the Item as a comment.
- Transfer Destination: Search for the Location(s) to which the Item should be transferred. The Location(s) entered here will become the new Responsible Location(s).
- The Make New and Clear Responsible checkbox: When this box is checked, the Item will transition to the New status and the Responsible Person will be removed.
- Click Transfer.